In previous articles, we discussed how to resize and rename projected-images for SSCC competitions using Adobe’s Lightroom and, for non-Adobe users, using a free software called Irfanview. Although Lightroom may be used by both Mac and PC users, the instructions for using Irfanview could only be used by PC users. This tutorial is intended for those Mac users who do not use Lightroom. The program we will use is called Preview and is Mac’s flagship OS program for editing photos (The other two Mac photo programs are Image Capture and Photos). Preview can import photos directly from a digital camera or iPhone and is a useful tool for resizing and renaming images to meet SSCC competition requirements as well as converting images to other formats and making color correction, if necessary.
When you open an image in Preview, you will get a screen like the one shown below.
In the top bar on the right, find the icon that looks like an upward pointing marker. If you hover over it, it will say, “Show Markup Toolbar” (It’s the icon to the left of the Search box). When you click on that icon, you will get a choice of tools in a drop-down bar as shown in the picture below.
To resize your image, click on the tool that looks like an empty square box with two diagonal arrows (fifth icon from the right).
 You will now see a dialog box called Image Dimensions as shown on the left. Click on the box with the widest dimension. For an image in landscape orientation, it will be Width. For an image in portrait orientation, it will be Height. Type in the value, “1920.” Be sure the dimensions are in “pixels;” not “inches.” Also, make sure both boxes named “Scale proportionally” and “Resample image” are checked.
If you notice at the bottom of the box, it will tell you the resulting size of the image. It should be less than 1 MB to meet SSCC competition rules. Click OK when done.
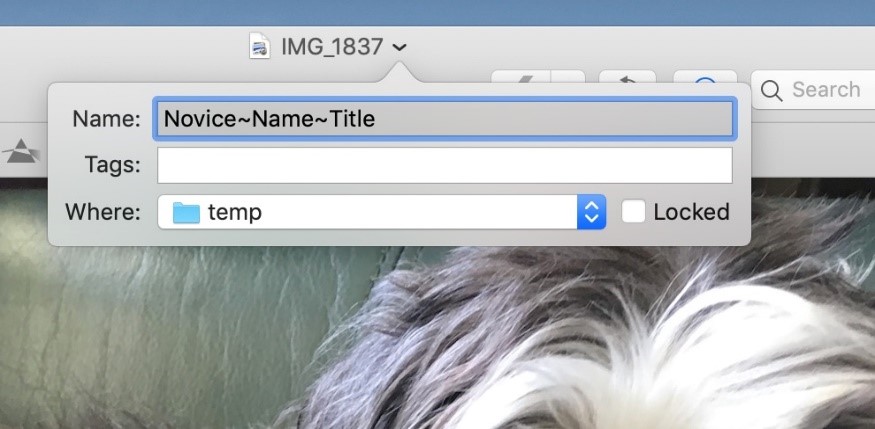
Now, to change the file name to meet SSCC projected-image requirements, the file name should be in the proper format: Class~Your Name~Image Title. The Class is either “Novice” or “Advanced.” NOTE: Your Name must be consistent in each competition. For example, don’t use “Robert Smith” one month and “Bob Smith” in another month. Otherwise, the database will assume you are two different people.
To change the file name, simple click on the file name at the top. In the image below, click on “IMG_1837.jpg.” A dialog box will appear with the file name in blue. Type in the SSCC-required file name. In the example below, the new file name is Novice~Name~Title.jpg. That’s it. You’re done!
As a final step, you could export your image to where you store your other SSCC competition  images.
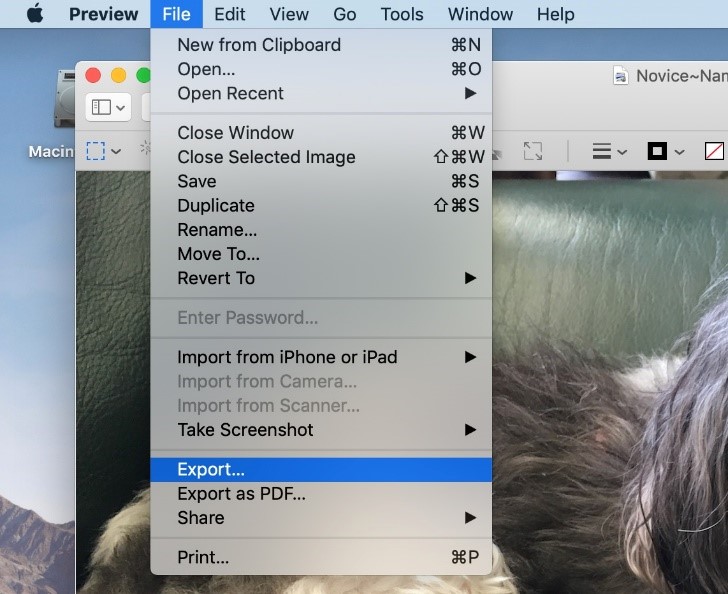
In that case, go to the very top bar and click on File (next to Preview) and then click on Export… Here you can export your resized image to another location.
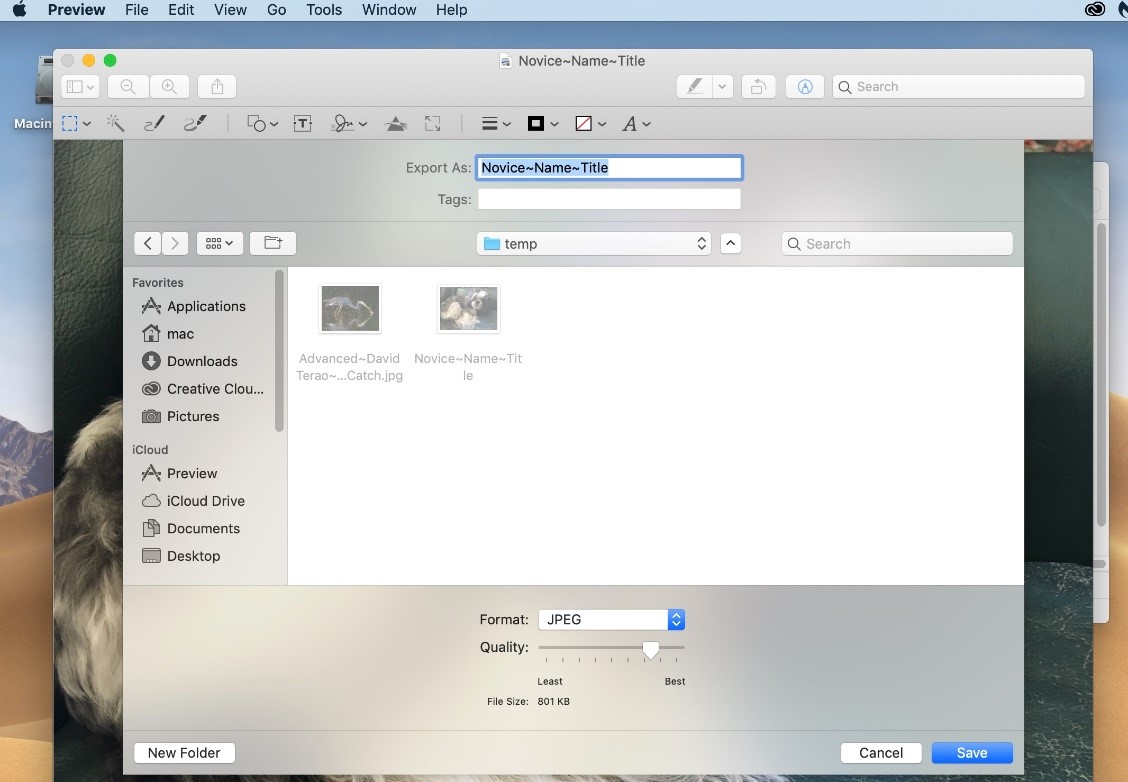
In the screen below, the revised image will be exported to a folder named, “temp.”
Note that you can also change the file name in the box at the top should you have forgotten to do it previously. And, you can change the file size by moving the Quality slider at the bottom until the size is approximately 1000 KB. Also, ensure in the Format box that the format specified is a JPEG. The file is now ready to be sent by email to the competition email address: competition@ssccphotography.org.


