by Dennis Freeman
You can get good panoramic images with just a tripod and ball head – but this is not likely in your backyard or local park due to the proximity of objects against the background.
In my first presentation ( How-to-Create-Panoramic-Images ) I showed good results using a handheld camera, illustrating that you don’t need anything but an ability to hold your camera level as you turn. I’ll add here that should you try this handheld approach, you should try to rotate the camera about the center of its lens rather than your body (i.e. shuffle your feet and keep the camera lens over a spot on the ground):

I showed good results with just a tripod and ball head, and had less top/bottom irregular border “waste” than I had with handheld. Finally, I showed results with an added panning clamp and nodal slide that allowed for undistorted foreground objects to be included.
Backyard test panoramas would fall in the “objects in the foreground” category, and are unlikely to work very well without special panorama gear.
You needn’t go to Great Falls, as I did, for a panorama subject. A little nearer, here is a ten image panorama from Lake Artemesia in College Park – actually Berwyn Heights. ( Lake Artemesia Map ) Note that there aren’t any foreground objects that span multiple images. Just a bush in the right image, and a bit of a bush in the left image. They aren’t involved in the overlap stitching, and this scene would be fine with just a tripod and ball head:

10-image Panorama of Lake Artemesia, College Park, by Dennis Freeman
You can actually test the foreground object issue yourself with your tripod and ball head in your backyard though. Just go out there, set up your tripod and level it moderately (not to the degree required for making a panorama).
Attach your camera to the top clamp of the ball head (either landscape or portrait for test purposes). Find something vertical and reasonably far away to serve as your background reference (could be the edge of a neighbor’s house, a tree, etc). Then find (or place) something vertical in the foreground. This foreground object should be far enough away to represent everything that will be closest to you in your actual panoramic image – say 5 feet to 10 feet away. (If you use a shorter focal length you will get more close-by objects in your panorama, and the optical center of your lens will move further away, than if you use a longer focal length with a narrower vertical field of view)
Line these two vertical objects up with your camera, and move your camera/tripod around until you get these pair of objects well-lined up in the center of your viewfinder/LCD. Pan left until the objects move to the right side of the viewfinder/LCD, and then pan right until the objects move to the left side of the viewfinder/LCD. If they stay lined up while you are panning, then you can include foreground objects in your panorama. If the foreground and background objects shift back and forth against each other when you pan, the stitching software might have trouble with it.
An example is how to get a nice panorama of a balcony. This is totally made up. The author placed a heart on a line and a crown on a line on the image of his balcony. The heart is supposedly the foreground object. As he “pans left” the background object moves left, and as he pans right, the background object moves right. He “slides his nodal slide forward” until this motion goes away. The right side of the figure shows very little movement as he “pans”. On the bottom he gets a successful stitching. Stunningly beautiful. Do this with the hearts and crowns in your own backyard.
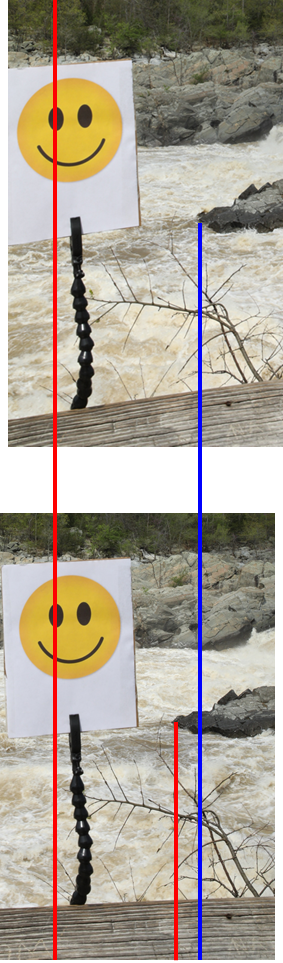
 Here was what my Mr. Smiley example (in my presentation I linked above) dealt with between panning shots. It wasn’t a huge shift, but the distance from Mr. Smiley to the rock on the right side got smaller as I panned, and it was enough to spoil his portrait in the final panorama. You will see this kind of shift in your backyard, and will either have to avoid Mr. Smiley, remove Mr. Smiley, or rotate about your lens’ nodal point:
************************************************************
Regarding having a level tripod/ball head, you will want to do the best you can.
You want to avoid the following:
 When all you have is a tripod and ball head, the part of the ball head that rotates during panning has to be level – and that is everything above its mounting plate. On the following, the ball head’s mounting plate is the thin part at the bottom of it with the angle numbers and lines. Clearly, the tripod itself has to level if the ball head is to be level. Not only does the ball head have to be level, but the ball mount stem has to be absolutely vertical:
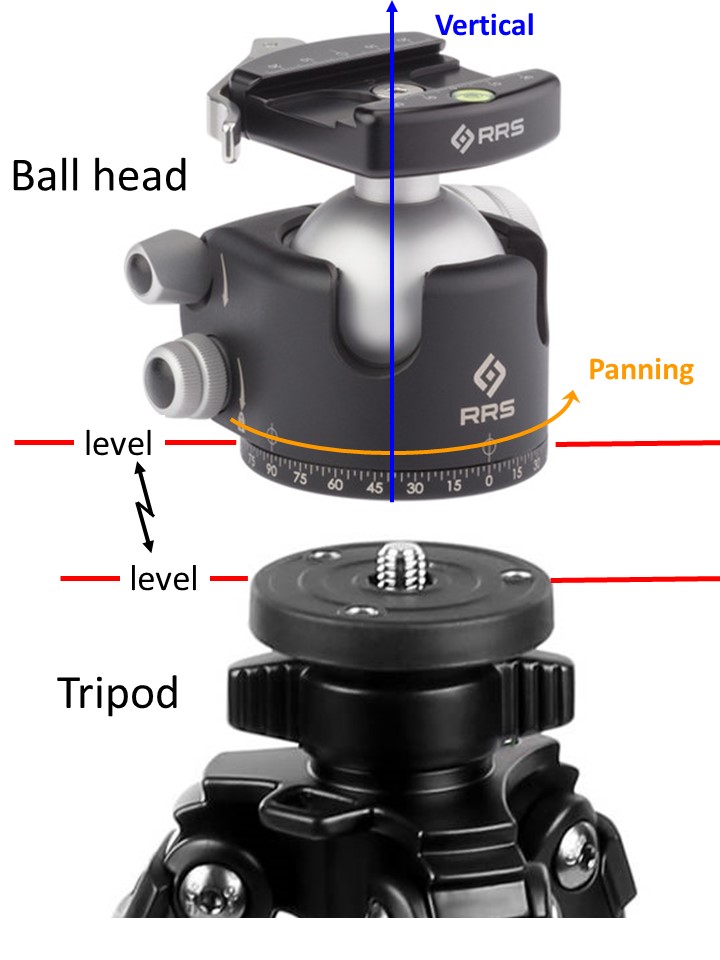 This is one reason that just using the tripod and ball head by themselves is a pain. How do you know when your tripod is level? When the ball mount is vertical? If your ball head has a bubble level and if your ball mounting stem is perfectly perpendicular to its base, then you can use mounted ball head’s bubble to adjust your tripod legs to get the whole thing level.
You can get your ball mounting stem perfectly vertical in your house before you go outside. Take the ball head off the tripod and set it on a level counter top. Adjust the ball so that the bubble is perfectly centered, then lock it down. (If your clamp doesn’t have a built-in bubble, you can balance a small level across the top of the mounting clamp).
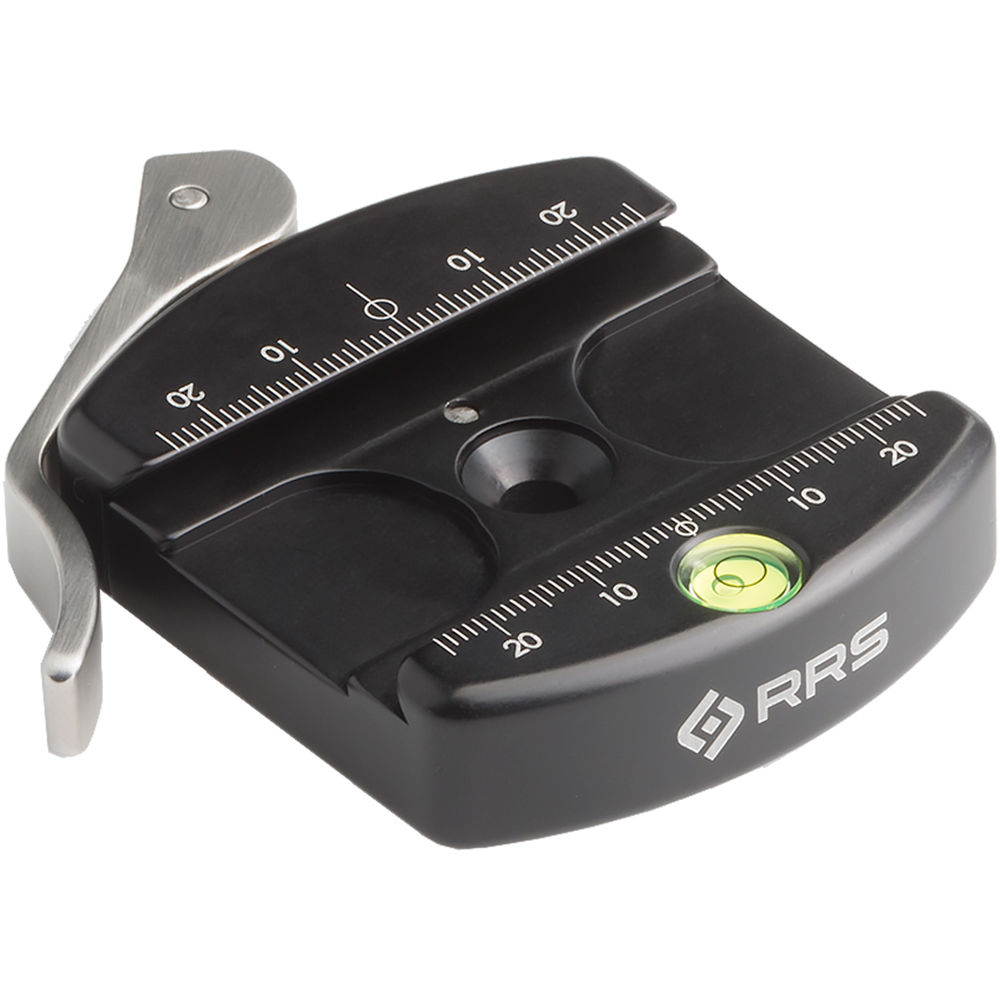 Mount the ball head on the tripod. Then outside, where you want to do the pano, adjust the tripod legs to center the bubble. This is tedious. After this is completed use only the panning base of the ball head to rotate your camera. Don’t touch the ball adjustment.
*******************************************
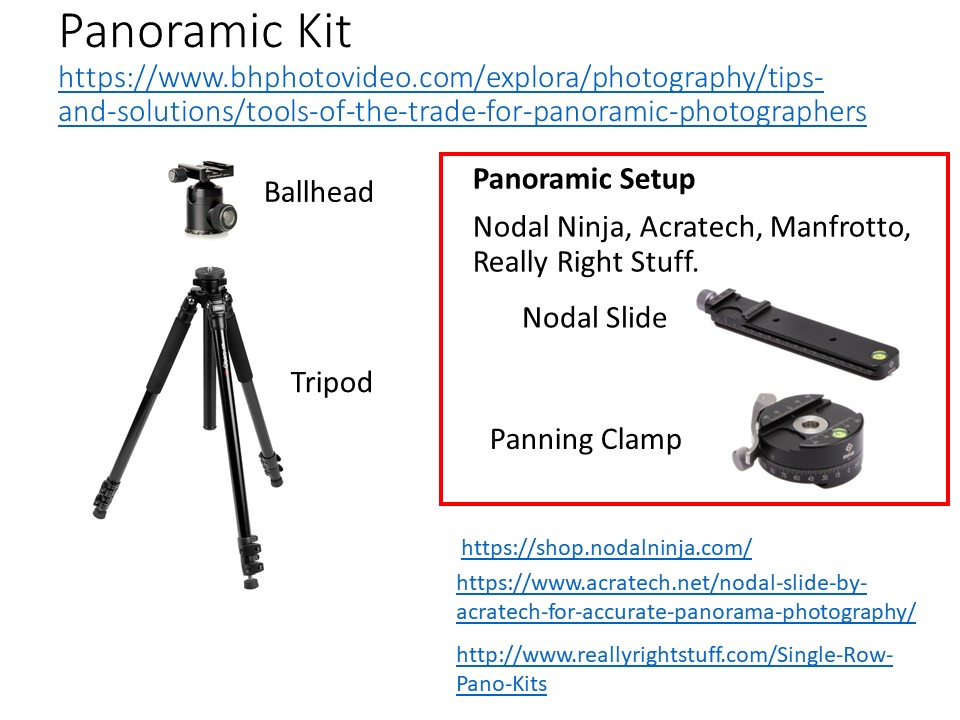
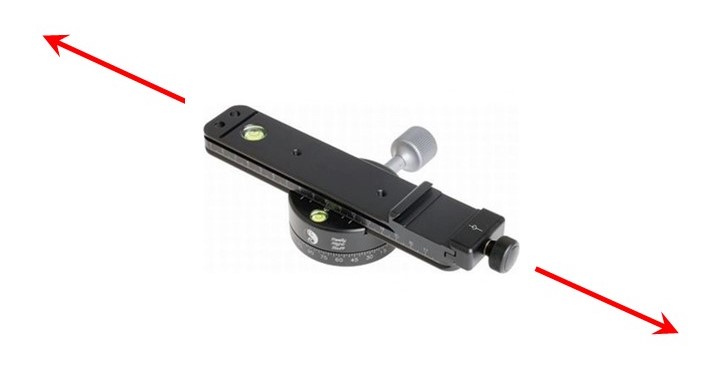
If you want to purchase a pano kit then your life gets a lot easier. And your wallet gets lighter. You will not need to go to great pains to level your tripod, nor have to get your ball mount vertical. You just have to plop down the tripod and its mounted ball head, lock the ball head’s panning base down so it doesn’t rotate ever, and adjust the ball to get the bubble centered on the top mounting bracket, even if the ball head itself isn’t level. The following figure illustrates this (with exaggeration). You can also directly mount the panning clamp to the stem of the ball head without using a separate ball head mounting clamp in between.
 The panning clamp that mounts to the top of the ball head is automatically level because the bubble indicates that the mounting plate is level. You rotate the camera by using the panning clamp, not the ball head. The nodal slide then mounts to the panning clamp, and is slid back or forth to remove foreground/background alignment issues. That’s all you need for all situations.
*************************************